
Cast Iron Seasoning
|
» Initial Seasoning
» About Seasoning Fats & Oils » Seasoning Fats and Smoke Points » Building A Good Seasoning » "Pre-Seasoned" Cast Iron » Tea Kettles » For Display Only |
In the context of cast iron cookware, the term seasoning is both a noun and a verb. A good seasoning (noun) is a matrix of polymerized oil and carbon residue, a durable coating, created layer by thin layer. What we do to establish and maintain that coating is also referred to as seasoning (verb).
The seasoning of cast iron cookware is necessary for a couple of reasons. The user of cast iron cookware needs it to be rust-proofed and also to possess a reasonably non-stick cooking surface. The collector desires both those properties in addition to the deep black color normally imparted by regular usage. To some, patience is its own reward, while others wish to achieve those goals more quickly via artificial means.
As you delve more into the subject, you'll likely become confused by various "scientific" approaches, or those that insist there's only one way (usually Great-Grandpa's) to do things. For the puposes of this article, we'll only briefly touch on some science-y concepts, and hopefully show that there are multiple ways to be successful.
While some insist the best non-stick surfaces and the best-looking patina are the result of "just cooking with it", a reasonable approximation of the appearance of a long-term seasoning, with patience and a proper understanding of process, can also be applied manually. In both cases, seasoning is built up in successive thin layers. Whether as a user or as a collector, however, the seasoning process is begun pretty much identically, with some oil and the oven.
Make no mistake, whether manually applying a seasoning or building one over time through cooking, the goal is not to return the pan to that thickly-encrusted state in which it was found. While that amount of build-up is representative of frequent usage, it also demonstrates a lackadaisical approach to cleaning and maintenance.
A proper long term seasoning is barely a millimeter or so thick, but it is resilient and durable. Using hot water and a non-abrasive scrubber to loosen and remove cooking residue after use will not affect it, other than to perhaps dull its shine a bit. But the shine can easily be restored with a minimal amount of oil wiped on and then off.
As noted above, seasoning consists of polymerized oil and carbon. When an oil is heated to and past its smoke point, it will thermally crack, meaning it breaks down. Part of this breakdown, besides a polymerization of the oil or fat, is the leaving behind of a carbon residue, the amount of which depends upon the type of oil. A higher carbon residue content can contribute to a harder, more durable, and more non-stick seasoning.
It's not as important that you choose an oil with the potential to leave the most carbon residue, but rather that you understand how you can help the oil you do use reach its potential. This is best done by knowing the smoke point of your oil and heating it to right at or just below that temperature. You will be working with a thin coating of oil, then heating that thin layer until it is dry but not sticky, indicating it has completely polymerized.
So, let's proceed.
Begin by gathering some supplies:
- Paper towels
- Terry cotton towel (think cheap or just old)
- A square of thick corrugated cardboard about 18"x18"
- Potholders or heavy leather gloves
- Vegetable shortening or a cooking oil like canola
Once free of rust and previous build-up, a cast iron pan must immediately be given some kind of an initial basic seasoning. This first layer of polymerized fat will help prevent the return of rust and provide a foundation upon which to build a good, slick new coat of long term seasoning.
Methods for manual seasoning vary. Most people just end up adopting a routine that has proven successful for them and sticking with it. There is not a single "right" way, but there are several wrong ways. For purposes of illustration, this is what I (and many others) do, and why:
After the piece is stripped to bare iron and well-rinsed (some advise a final washing using Dawn™ dishwashing liquid at this point, and that's OK), dry it with paper towel, and set the oven to 200°F.
As you wipe the piece dry, you may get a black or brown residue staining the paper towel. It's not unusual. Cleaning methods like electrolysis convert red rust to a soft black form of oxide. Clean, bare iron will also begin to oxidize again almost immediately, by a phenomenon known as flash rusting, especially if ambient humidity is high. That's OK, too. Both will wipe off as you apply the first coat of seasoning fat. Tip: Using cold water for the final rinse seems to help minimize flash rust.
 Place the piece in the oven and let the 200° heat dry it completely, about 10 minutes. Leaving the oven door cracked open a bit during this initial heat-drying phase also helps to let moisture escape and minimize flash rusting.
Close the oven door and raise the oven temp until it reaches 350°F. We want the temperature of the oven somewhat near but below the smoke point of the oil we'll be using. Canola and refined grapeseed oil, both good choices, smoke around 400-425°F; commonly-used Crisco shortening smokes at 490°F. All will still polymerize at 350°F if the applied layer is extemely thin and it is heated long enough to reach a "dry" state, meaning they no longer feel sticky or tacky to the touch (after cooling, of course).
You may have read elsewhere about exceeding the smoke point of the oil being used as a necessary step. This comes from the desire of collectors for a pan that has been stripped and will probably not be used to appear as if it has been. More on this below under Seasoning Fats and Smoke Points.
Potholders, an oven mitt, or welder's gloves are useful at this point. Do not use articles made from synthetic fiber as they will melt and fuse to the hot iron.
Carefully remove the hot pan and place it on the piece of thick cardboard (to protect counter top or other working surface). Using 2 full sheets of paper towel folded over multiple times to make a thick pad, apply a thin coat of the oil or shortening all over the piece. No need to be generous, but do get into the nooks and crannies. Too much will tend to quickly melt and soak through your applicator pad, transferring the heat of that 350°F pan right to your fingers. Besides, in the next step you'll be wiping most of it off anyway.
Why Crisco? Crisco or other solid shortening is a highly refined cooking fat product. As such, it has a high smoke point, and, coupled with its reduced impurities, won't stink up the house as badly as some other fats can when subjected to the oven heat. It is also inexpensive and readily available.
Bear in mind that the function of initial seasoning is primarily that of rustproofing and providing a base for establishing a good new seasoning via cooking. You don't need to spend extra money on anything exotic.
As you wipe the oil onto the pan with the folded paper towel pad, you will likely notice the pad and oil on it turning brown. This is just a result of the hot pan and oil "cooking" the paper towel somewhat. It can also be from residual flash rust. Either is normal.
Tip: For pieces such as cornstick pans, muffin pans, or waffle irons, small pieces of stiff or corrugated cardboard are handy to work the seasoning fat into hard to reach areas. Dip an edge into the Crisco or oil, and poke it into the crevices. A cheap, natural bristle basting brush can also be helpful in "painting" seasoning fat or oil into the details of intricately-patterned pieces.
Next, using a cheap terry cotton towel, wipe the piece like you're trying to remove everything you just slathered all over it. Don't use paper towel for this step, as it will tend to shred, and, once saturated, will not remove as much of the excess oil as you want. All you want remaining is an extremely thin layer of oil. The pan should look glossy, not wet.
Note: Some have reported successfully using compressed air as a means of removing excess seasoning oil from intricate details and crevices. Be cautious, however, of using canned office equipment dusters for this purpose. Extended use and agitation of the can will cause the air stream to become extremely cold and potentially damaging to the hot iron.
Then, back in the oven it goes-- upside down, this time-- for 15 minutes, after which you'll want to remove and wipe it down with the terry towel once again. As with the paper towel, you'll get the same browning, but likely also a gray coloration on the terry towel. The latter is from the iron itself, and is also of no concern.
Return the piece to the oven, again upside down. After 30 to 45 more minutes, turn the oven off and let the piece cool slowly without opening the door. Depending on the oil used, the baked on oil coating the pan may become dull and flat in appearance, but it should not be sticky. If, after cooling, you find it to be tacky, give it more baking time until it no longer feels sticky. Do not add another layer of oil until the preceding layer has been baked dry.
The reason for placing the pan in the oven upside down to prevent any excess shortening or oil from possibly forming pools or droplets on the cooking surface which would likely remain as sticky areas after cooling. The reason for the second wiping is simply in case you didn't wipe enough off the first time. If not, even with the pan upside down, even a little excess can congeal into small droplets on the cooking surface, resulting in spotting and stickiness. If you'd like your pan to have an overall even appearance, you'll need to strip it again and start the seasoning process over. If you don't mind the look of the spots, just return the pan to the oven at your oil's sub-smoke point temp and bake it until the spots feel dry, not tacky.
You may have read an article or have seen a video online telling you to place aluminum foil under your pan in the oven to catch dripping seasoning fat. If you are doing it correctly, however, there should be no need for this, as there should not be enough oil left on the pan to drip off.
Don't be tempted to try to accelerate the seasoning process by baking on a thicker coat of oil in a single pass. Not only can the result be a sticky mess, meaning the too-thick oil did not polymerize as completely as necessary, but thick layers tend to suffer from poor adhesion and are subject to sloughing off.
If you wish, you can repeat the oil-baking process one or more times, but it's up to you. Some collectors advocate immediately repeating this manual oven seasoning up to a half-dozen times in an effort to prematurely darken the color or to jump start the non-stick surface. But many find that to be tedious, opting instead to simply allow cooking in the pan to give both the best-performing seasoning and best-looking patina. The latter point of view is that such a coating will naturally occur with usage over time, so the additional costs of energy, fat/oil, and the odor of repeated manual seasoning applications are not worth the time, trouble or expense.
When I'm done, and after the pan is cool, I like to wipe the item down with an extremely small amount of the shortening or canola oil (or even a couple of spritzes of PAM), just to give it a cosmetic sheen.
Once your pan has been cleaned and given an initial basic seasoning, it is ready for cooking use. The non-stick property for which cast iron is revered, however, will not yet be up to its full potential. Only time and repeated usage will provide the additional layers of seasoning necessary. Since seasoning is primarily hardened layers of a combination of polymerized fat and carbon, cooking foods like bacon and sausage will help accelerate the process, as will frying potatoes or baking cornbread.
Depending on a variety of factors-- the seasoning fat used, the temperature to which the piece is heated, and even the individual piece itself-- the initial seasoning may result in an overall brownish or bronze caste. This may be considered normal; built-up seasoning will eventually darken to deep black.
Traditionally, seasoning fats typically included lard and bacon grease, but they are not found in home kitchens as commonly as they once were. Some say animal fats are a must, or that the fat used must be a solid at room temperature, but these are not necessarily mandatory. Besides the very popular Crisco™ shortening, other good choices for seasoning fats include canola oil, Original PAM™ Cooking Spray (contains canola oil), and refined grapeseed oil (475°F smoke point).
Is one oil better than the others? There is some merit to choosing a more highly unsaturated oil over a saturated one. Oils with more highly unsaturated fat content do break down and polymerize more readily.
A method for determining the overall degree of unsaturation involves the use of an iodine-containing solution. From this process, various oils are assigned a range of "iodine values" or "iodine numbers" which represent their degree of unsaturation. The higher the number or range, the more unsaturated the oil.
Since all oils contain various percentages of the three types of fatty acids, an individual oil is considered a saturated, monounsaturated, or polyunsaturated fat depending on which type of fatty acid in it predominates.
Some examples of iodine values of different oils*:
| Oil | Iodine value |
| Coconut oil | 7 – 12 |
| Palm kernel oil | 16 – 19 |
| Cocoa butter | 35 – 40 |
| Palm oil | 44 – 51 |
| Lard | 48 – 65 |
| Olive oil | 80 – 88 |
| Peanut oil | 84 – 105 |
| Avocado oil | 85 – 90 |
| Rice bran oil | 95 – 108 |
| Cottonseed oil | 100 – 117 |
| Corn oil | 109 – 133 |
| Canola oil | 112 - 117 |
| Wheat germ oil | 115 – 134 |
| Soybean oil | 120 – 136 |
| Walnut oil | 120 – 140 |
| Grape seed oil | 124 – 143 |
| Sunflower oil | 125 – 144 |
| Safflower oil | 136 – 148 |
| Linseed (flaxseed) oil | 136 – 178 |
| Tung oil | 163 – 173 |
*Different sources may list different ranges of values, but they will generally agree on relative degree.
Oils with very low iodine values are superior for soapmaking. Those with very high values, like linseed oil, were very early on found well-suited for making oil paints.
Oils with iodine values 130 and above are considered "drying oils", 115-130 are "semi-drying", and below 115 are "non-drying".
A drying oil is one which, upon contact with air, begins to oxidize and, after a period of time, hardens to a tough, solid film. Through auto-oxidation, drying oils polymerize on their own, even without the application of heat. You can observe this on the exterior of containers of semi-drying and drying oils. Oil that has dripped and been allowed to remain on the bottle surface becomes sticky and tough to remove. Canola and grapeseed oil are two food quality examples. A non-drying oil such as olive oil will remain slippery.
But degree of unsaturation alone is not sufficient to make an oil a superior seasoning medium. We must remember that carbon residue also plays a large role in creating both a durable and non-stick coating.
You may have read elsewhere about the supposed virtues of flaxseed oil as a seasoning fat. The assertion is that the combination of its low smoke point and classification as a drying oil makes it somehow superior to other commonly used fats in terms of polymerization and resulting hardness.
That which I have read of others trying it has provided mixed reviews, including complaints of poor adhesion. I have tried using it myself, and have not been compelled to embrace it as a regular methodology. Perhaps those of us who tried it and found it lacking did not follow the given instructions precisely enough. It can also have a fishy odor if rancid.
As a manually applied seasoning, it is cosmetically attractive, but too many report that it doesn't hold up under use. And since flaxseed oil is not used as a heated cooking fat, seasoning cast iron cookware with it seems counterintuitive.
My preference remains good old Crisco or refined grapeseed oil for oven seasoning, and canola oil or PAM for post-cooking wipe-downs.
A comment responding to an article from thekitchn.com counters this "science-based" approach of using flaxseed oil, and may explain why it is so many who try it experience that troublesome flaking:
KathiT
Flaxseed oil is fine for display pieces but a poor choice for seasoning cooking pans.
The main reason it is a poor choice for cooking pans is that it forms a non-durable coating that is brittle and which chips and flakes easily. If you plan on re-selling your seasoned pan, season with anything else because people who love CI don't buy flaxseed-seasoned pans
Degree of unsaturation discussions always seem to neglect discussion of long term durability. As a chemist, I understand the principle behind why people believe it is a good coating... high unsaturation = more crosslinking... but that is only part of the seasoning story. High unsaturation also leads to a polymer that is more brittle and with less carbonized material in the interstices. Carbon is important to both non stick properties and durability of the seasoning layer.
Better choices for seasoning cooking pans are canola oil, Pam, Crisco, or Crisbee (TM).
I mostly use Crisco and Crisbee. Crisbee is especially good for pans that will see storage because it does not go rancid. It also smells really nice when the pans are in the oven. I also like Canola and Pam (which have a high degree of unsaturation if you like that theory). Because it is a spray, Pam is particularly nice for seasoning pans that have lots of nooks and crannies, such as corn stick pans or gem pans.
I personally do not subscribe to the unsaturation level as sole indicator of whether a fat makes a quality seasoning. Coconut oil is used by a lot of people for seasoning baking pans despite more saturated. I have a coconut oil-seasoned bundt pan and it practically SPITS cakes out, even when my pan prep is sloppy.
You need some unsaturation to crosslink, but it is more important that you
1). Start with a CLEAN pan (no rust, no baked on food)
2). Apply a thin layer (do not gob it on) and wipe off the excess.
3). Season at a high enough temperature (500 degrees)
4). Leave in the oven long enough (1 hour minimum)
5). Don't open the oven door until the temp is back down to 250 degrees, especially if you are working with vintage pieces
6). Repeat the process a few times to build up a nice layer. I usually go through 3 cycles.
So, it just may be that while unrefined flaxseed oil, by the numbers, might appear to technically excel at polymerization and carbon residue, it still comes up short in durability under actual usage conditions.
If you do decide to try it, be aware that caution must be exercised when using a drying oil. Flaxseed oil is the food-grade version of linseed oil, once commonly used in house paints. You may have heard of fires being caused by the spontaneous combustion of oily rags. Drying oils auto-oxidize as they dry. The heat generated by this process can, under the right conditions, reach the temperature necessary to ignite the rags. Although other components present in the linseed oil used for paint contribute to this hazard, it may still be prudent to treat any drying oil-impregnated rags as potentially dangerous, and to dispose of them safely.
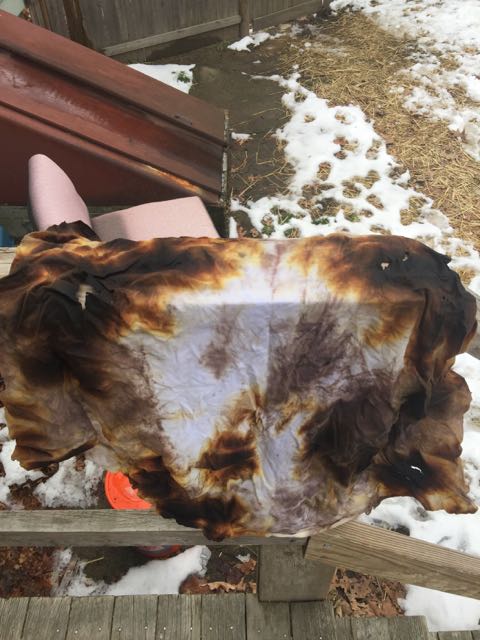
Flaxseed oil-soaked rag spontaneously-combusted.
Another recent development in the realm of cast iron cookware seasoning are products combining vegetable shortening and beeswax. A noted above, shortening has long been a mainstay for a basic initial seasoning application. The allure of the addition of beeswax, however, seems to be its being perceived as a shortcut to the non-stick properties for which a well-seasoned cast iron pan is famous. As with flaxeed oil, the question remains, "Would you cook with it (beeswax)?" If the answer is no, there would seem to be no reason to season your cast iron with it, either, other than impatience.
Every cooking oil or fat has a temperature above which various compounds contained within it become volatile or oxidize and it begins to give off smoke. Each has an even higher temperature at which it will combust. These are known, respectively, as the smoke point and the flash point.
The smoke point of an oil or fat should not be exceeded during cooking, as potentially carcinogenic compounds can be formed and released. But the advice is often seen given to do just that during the manual seasoning of cast iron cookware. Some like to artificially accelerate the darkening of the seasoning by cranking the temp up above the smoke point of one or more layers of the manually-applied oil.
Since a superior non-stick seasoning coat consists not only of polymerized fat, but also of a mixture of carbon within it, the thinking is that exceeding the smoke point will carbonize the compounds in the oil to desirable effect. While it may produce the desired cosmetic effect, this may not be prudent, and is, again, not really necessary, as the pan will darken with use and more layers of seasoning.
What you may wish to do instead is, prior to applying any seasoning, heat the pan gradually to 450-500*F for an hour or so. This has been observed to darken the bare iron somewhat. You will, however, need to let it cool to a temp appropriate for your seasoning oil before continuing.
For those who are interested in the smoke points of typical cooking oils, here is a handy chart:
| Oil or Fat | Quality | Smoke Point |
| Avocado Oil | Unrefined, Virgin | 375-400°F |
| Avocado Oil | Refined | 520°F |
| Canola Oil (Rapeseed) | Expeller Pressed | 375-450°F |
| Canola Oil (Rapeseed) | High Oleic | 475°F |
| Canola Oil (Rapeseed) | Refined | 400°F |
| Canola Oil (Rapeseed) | Unrefined | 225°F |
| Coconut Oil | Dry Expeller Pressed Virgin, Unrefined | 350°F |
| Coconut Oil | Dry Refined | 400°F |
| Corn Oil | Unrefined | 352°F |
| Corn Oil | Refined | 450°F |
| Cottonseed Oil | 420°F | |
| Flax Seed Oil | Unrefined | 225°F |
| Flax Seed Oil | Refined | 430°F |
| Ghee (clarified butter) | 485°F | |
| Grapeseed Oil | Refined | 420°F |
| Lard | 390°F | |
| Olive Oil | Extra Virgin | 375°F |
| Olive Oil | Virgin | 391°F |
| Olive Oil | High Quality (Low Acidity) | 405°F |
| Olive Pomace Oil | 460°F | |
| Palm Oil | Difractionated | 455°F |
| Peanut Oil | Unrefined | 320°F |
| Peanut Oil | Refined | 450°F |
| Rice Bran Oil | 490°F | |
| Safflower Oil | Unrefined | 225°F |
| Safflower Oil | Semi-refined | 320°F |
| Safflower Oil | Refined | 510°F |
| Shortening, Crisco Brand | 490°F | |
| Shortening, Vegetable | 360°F | |
| Soybean Oil | Unrefined | 320°F |
| Soybean Oil | Semi-refined | 350°F |
| Soybean Oil | Refined | 460°F |
| Sunflower Oil | Unrefined | 225°F |
| Sunflower Oil | Semirefined | 450°F |
| Sunflower Oil | Refined | 440°F |
| Sunflower Oil | High Oleic, Unrefined | 320°F |
| Tallow, Beef | 420°F |
Note that refined versions of cooking oils typically have higher smoke points than the unrefined versions, and, while better for higher heat cooking, are not necessarily better for manual cast iron seasoning. Also note that smoke point in and of itself does not necessarily correlate to the superiority of a particular oil or fat as a seasoning medium. Actual smoke point may vary between brands or batches of the same type oil, and can also depend on the degree of freshness. If you have the means to measure the temp of a hot oil, you can test the oil you use by heating some of it on the stove top until it begins to smoke.
Although a good, non-stick seasoning will be established over time just by cooking in a pan, along with proper cleaning and maintenance, there are some other things you can try to help it along.
One way to help your build-up of seasoning is to pop popcorn, the effect of which is to add an additional thin layer while at the same time making a tasty snack.
Another is to make efficient use your oven's heat while cooking something else like baked potatoes for an hour at 400°F. Just wipe on (and off) a thin layer of a higher smoke point oil, and place your pan on an unused rack. You can leave the pan to cool in the oven when done baking.
An additional way you can help build your polymerized oil/carbon seasoning patina is to employ some used oil as your manual seasoning product. Oil that has already been used to cook with will not only more easily break down leaving behind its own carbon residue, but will also contain additional carbon residue from the food that was cooked in it. This is especially true of oil used to fry potatoes or battered foods like fish or chicken. The fine particles of starch, flour, or cornmeal contained in it will become readily carbonized. A used oil also has a lower smoke point than that of its fresh counterpart, so bear that in mind if you do try it.
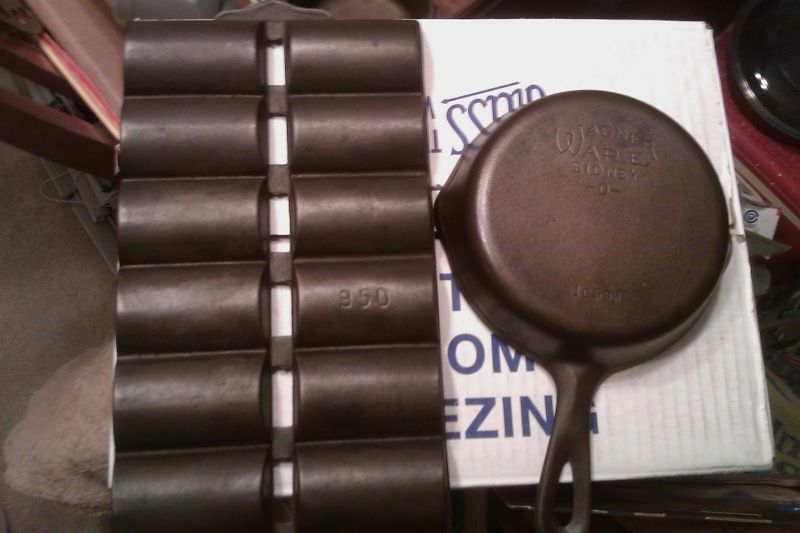
Here are two pieces that were cleaned using a combination of lye and electrolysis, and seasoned using the Crisco method described above. Residual black stains on the inside of the small skillet were reduced using the vinegar/water solution described in Basic Rust Removal.
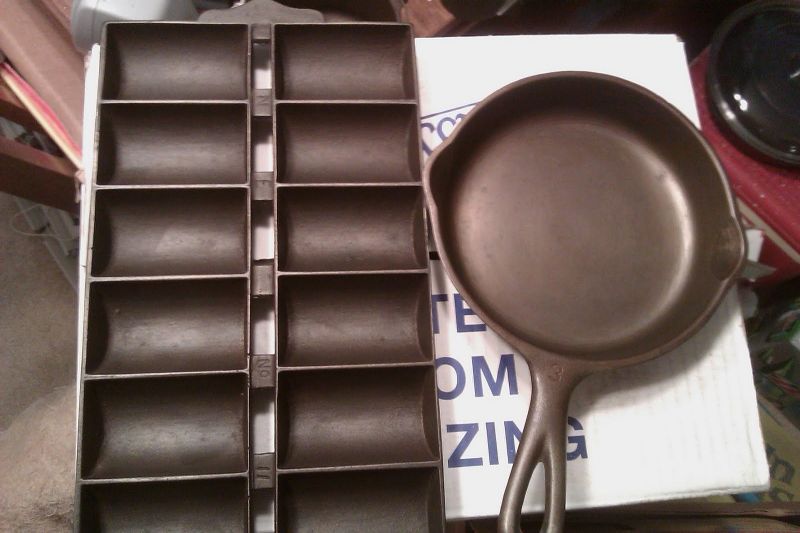
And here's a Lodge #7, after seasoning with grapeseed oil:


As more maintenance-free types of cookware emerged in the latter part of the 20th century, it became increasingly difficult for manufacturers to win new fans of cast iron. As early as the 1940s, Wagner, and in the 1950s, Griswold and Lodge, moved away from the traditional practice of applying a rust-proofing lacquer in favor of a ready-to-use pre-seasoning. Not much was made of the innovation beyond pointing out that, unlike the lacquer which had to be burned or scoured off, the new seasoning required only a washing with soap and water before first use.
Decades later, Lodge, as the only remaining maker of cast iron cookware in the US, introduced with much fanfare their Lodge Logic™ brand in 2002. Using a "proprietary soy-based vegetable oil", the iron is both protected from rust and given an initial seasoning layer at the factory. As with manual seasoning, however, additional layers must be built up in order to reach an optimum level of "non-stick" properties. This factory-applied seasoning is also subject to the same maintenance requirements as manual seasoning.
An often asked seasoning question concerns what to do about the inside of tea kettles. While the outside can be rust-proofed with a layer of most any type of commonly used oil or fat just like with skillets, the inside is a different story. One solution is lime scale. Repeatedly boiling water, especially hard water, will build a coating of lime scale that will help keep rust at bay. Instructions with Wagner tea kettles recommended filling with water and boiling completely dry two or three times.
Another solution is tannin. The tannic acid in tea leaves will react with the iron and inhibit the formation of rust. Save used tea leaves and bags for this method, placing several in the pot and adding boiling water, letting sit 20 minutes, then discarding and rinsing. For display only, you can use the method below.
Ever see those photos online of vintage cast iron pieces, and they have a beautiful, even, satiny black color? They're not painted. But, are they really in such great condition? Maybe. Or is there a trick to getting them to look like that? The answer is yes.
If you are restoring cast iron for collectible purposes only and will not be cooking with your pieces, you may only want apply a rust preventative coating. For this, we can use mineral oil, which has several benefits.
With mineral oil, the oven time and temperature required are much shorter and lower. After cleaning to your satisfaction, dry and heat the piece in the oven as usual to 200°F. Then, crank the oven up to 300°F.
As an alternative step, before applying any mineral oil, raise the oven temp slowly up to 500°F, in 75 or 80 degree increments. This actually helps darken the iron, and some collectors even do this step on pieces they intend to use. Then, lower the oven temp back to 300°F, cracking the oven door open a bit to help the temperature drop.
Once the oven temp has reached, or, alternately, dropped to 300, remove and rub the hot iron all over with a thin application of food grade mineral oil, the stuff marked "USP" you can buy at the drug store. Then wipe off the excess, just as you would if you were seasoning with a cooking fat. Return the piece to the oven for a bit, then turn it off and allow to cool.
The additional advantages here are that you only need a single application, and you get a nice darkening effect, making the piece more cosmetically attractive. Further, the piece won't become sticky over time, as may be possible with cooking fats.
Don't be tempted to apply mineral oil to a piece while heated up to 400 or 500° to darken the seasoning as you might with cooking fats. You don't want to exceed the smoke point of the mineral oil. Mineral oil was formerly employed by theatrical fog generators, but its use was discontinued after widely-reported instances of respiratory irritation by those regularly exposed to it. Those who may have long ago owned electric toy train locomotives that came with a bottle of liquid drops to produce artificial "smoke" will likely recognize the odor of vaporized mineral oil.
If you ever decide you want to cook in your mineral oil-protected piece, simply wash it with hot water and dishwashing liquid, and then apply your regular cooking fat-based seasoning regimen before use.
  
|
||
| Any purchases you make from Amazon can help support this web resource. Click to find out how. | ||
|
|
||


|
This site is a participant in the Amazon Services LLC Associates Program, an affiliate advertising program designed to provide a means for sites to earn advertising fees by advertising and linking to Amazon.com or its affiliates. |