
Cast Iron Cleaning With Electrolysis
Among the variety of restoration tools available to the dedicated vintage cast iron cookware collector, perhaps the most useful of all is cleaning by electrolysis. While a bit more work and expense than other methods to set up, a properly designed and implemented electrolysis tank can remove both rust and build-up in relatively short order.
The term electrolysis comes from two Greek words, and essentially means "to break down using electricity". Some may remember high school science class experiments in which electrolysis was demonstrated to break down water into its molecular components of hydrogen and oxygen. But an electrolytic cell can also affect the electrodes to which the voltage source is attached, either by adding material, removing material, or both. The process, under conditions of high voltage and temperature, is the basis for electroplating such as that of decorative chrome on automobile parts.
For our purposes, electrolysis cleaning works somewhat like chrome plating in reverse. By connecting the positive and negative wires the opposite of the plating process, you get crud and rust removal.
The most common set up for an electrolysis iron cleaning tank involves a plastic storage container or the like, sturdy enough to be capable of holding eight or more gallons of water, and a car battery charger. You'll need a piece of metal, either iron or steel, that will serve as a "sacrificial anode" to which the electrical current will flow from the piece being cleaned.
You'll also need turn the water in the tank into what's called an electrolyte, making it more conductive so the current will flow more readily through it. For this, we use Arm & Hammer Super Washing Soda™ (not baking soda), available in the laundry additives section (medium size yellow box), at the rate of 1-2 tablespoons per gallon of water. Washing soda is primarily sodium carbonate, whereas baking soda is sodium bicarbonate.
Some people use a swimming pool water conditioner called pH+, which consists of sodium carbonate. Some advanced hobbyists use sodium hydroxide aka lye to achieve a double-acting electrolyte/cleaning solution, but for most, the simpler and less-hazardous washing soda will do.
| Gallons of Water | Washing Soda | |
|---|---|---|
| 5 | 5-10 T. | 1/3 - 2/3 C. |
| 10 | 10-20 T. | 2/3 - 1-1/3 C. |
| 15 | 15-30 T. | 1 - 2 C. |
| 20 | 20-40 T. | 1-1/3 - 2-2/3 C. |
| 25 | 25-50 T. | 1-2/3 - 3-1/3 C. |
To properly connect the voltage source, you just have to remember the blacK (negative) wire goes on the sKillet. Also, the battery charger you use must be a manual one, or have a manual charge mode. An automatic charger will see the electrolysis tank as a charged battery and shut itself down.
If you already own a fully automatic charger and don't wish to purchase a manual one, there is a workaround, although it necessitates the use of a 12V car battery. Hooking up an automatic charger to the battery as if to charge it, you can then use jumper cables from the battery to your electrolysis setup. Current stored in the battery will flow to the pan and sacrificial metal, and the charger will happily supply current to the depleted battery.
Heightened care is required using this setup as you must be diligent in properly maintaining the positive-to-positive and negative-to-negative connections between charger and battery. You must also ensure that the positive and negative leads from the battery do not directly touch. Additionally, the terminals and clamps can become hot.
I use a 2amp/10amp switchable manual 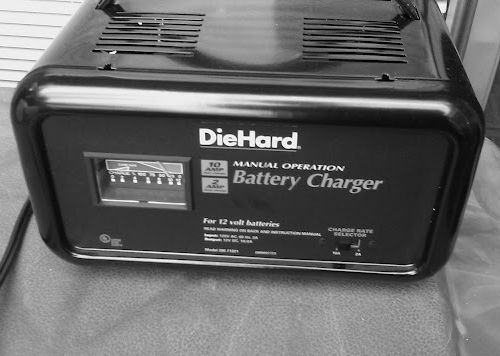 Die Hard™ Charger from Sears. I understand Sam's Club has some inexpensive manual chargers as well.
|
|
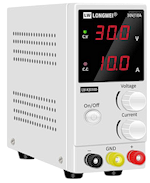
Manual car battery chargers have become increasingly harder to find. Another relatively affordable alternative is a variable DC power supply. Normally used for electronic equipment testing and repair, they offer advantages such as adjustable voltage and current. Set the unit to deliver and maintain a desired constant current (amperage) to achieve the best results. Available on Amazon. |
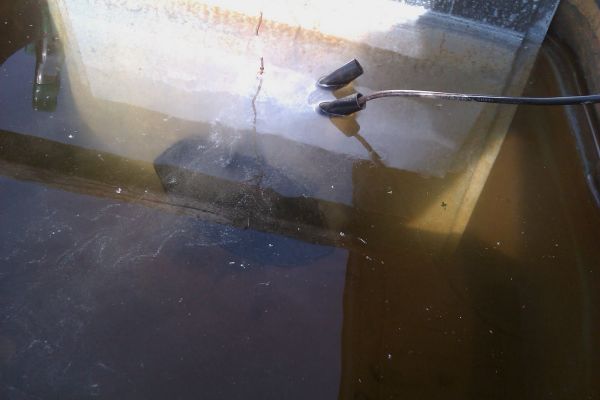
I place a length of 2x2 wood across the top of my container, and suspend the pans in the water from it with coat hanger wire, attaching the black connector to the unsubmerged tip of the handle of the pan. The other, red connector goes to a piece of air conditioner cabinet steel sheet metal I get from an HVAC guy who often has panels of new, unpainted metal left over from his installations.
Other options for cheap anodes include rebar or used lawn mower blades. Larger steel cans like those for fruit juices with top and bottom removed, cut down the side and flattened are another inexpensive alternative. Anodes with more surface area tend to be the most efficient.
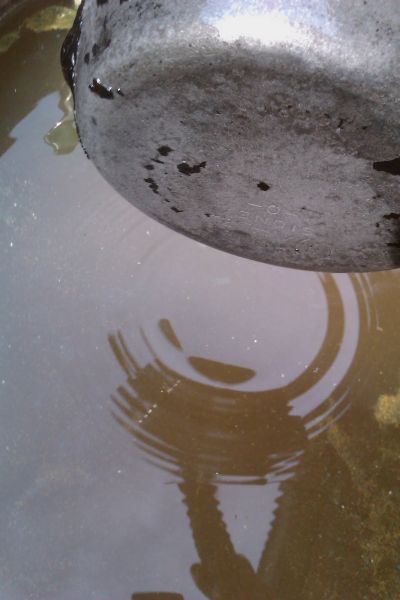
For best results, make sure the connectors make good electrical contact with both the piece being cleaned and the sacrificial metal. Use your wire brush or stainless steel scrubber to remove some of the rust and/or crud at the spot on your piece to which you will be attaching the charger connector.
In the long term, to keep your clamps away from corrosive moisture or being affected by the electrolytic process, you may opt to not connect your charger clamps directly to the piece, instead attaching them to the metal bracket or wire the piece is hung from. Adequate current should still be able to flow if all attachment points are relatively clean, bare metal.
Poor connections cause increased electrical resistance and excessive heat. Clean metal-to-metal connections will assure the most efficient cleaning and the least damage to charger leads over time. Charger clamps becoming noticeably hot during use is an indication of poor contact.
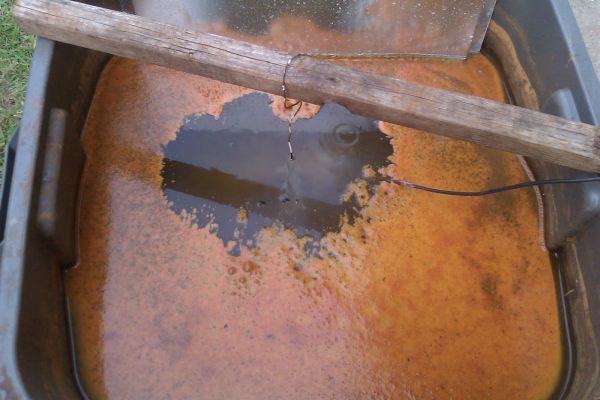
Also, don't be tempted to add more washing soda than recommended; it can cause excessive current and overheating problems which may make the charger shut down or melt cable wire insulation. You'll know you have good current flowing when you see a mist of fine bubbles forming around the piece and your charger's amp meter reads towards the upper end of its scale.
The process of electrolysis converts red rust (ferric oxide) to ferrous oxide, sometimes called black rust. The process also both coats and rots the "sacrificial" piece of metal over time, so it will need to be scraped down occasionally, or flipped so that a clean side faces the piece being cleaned. Eventually, it will need to be replaced.
A byproduct of the electrolytic process is the formation of potentially flammable hydrogen gas. It is prudent, therefore, to insure the area around the setup is well-ventilated, or, better, to consider doing it outdoors.
Electrolysis cleaning is largely a line-of-sight process, meaning the side of the piece closest to the sacrificial metal will become cleaner first. If you put something between the piece and the metal, a "shadow" of crud will be left on the piece where the object blocked the flow of current from the piece. Some people's set-ups have metal on both sides, or surrounding the piece for faster action. I just turn the piece around from time to time.
Visually, built-up crud loosens, and peels or flakes off like old paint. In some places, it sticks tighter, and takes longer to come off. The red rust will turn into a fine, soft black residue that easily wipes or scrubs off. The process is finished when the metal is bare and gray. Some darker staining may remain in spots that were particularly cruddy, but that's OK, it can be dealt with.
Tip: If the rust is only on the inside, large format pieces like cauldrons and washing kettles can become their own electrolysis tank. Fill with water and dissolve an appropriate amount of washing soda for the volume. Use a 2x4, a piece of PVC pipe or other non-conductive material as a crossbar and hang a piece of sacrificial metal from it. Attach the negative cable of a manual battery charger to the side of the pot and the positive to the sacrificial anode.
How long does the electrolysis take? Before I started using lye, cleaning an average piece using electrolysis alone might have taken a couple of sessions, maybe 8 hours each. Softening things up with the lye first reduces that to about one afternoon session of a few hours. Hanging the piece to be cleaned as close as possible but without touching the sacrificial metal also tends to speed up the process.
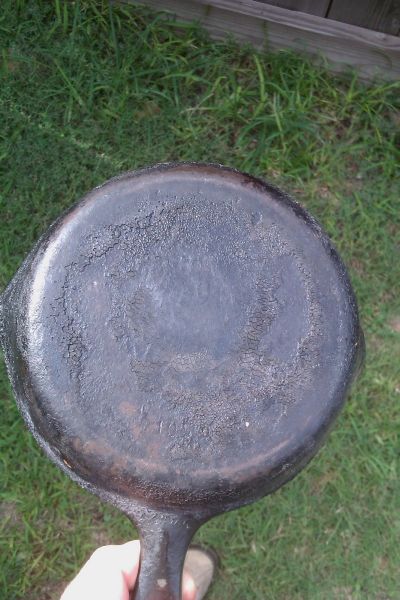
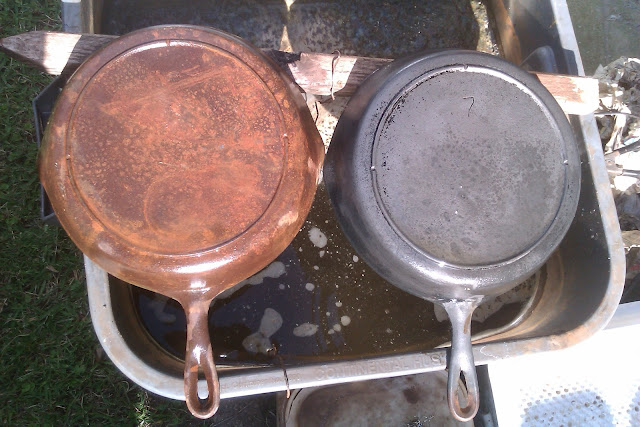
Two identically rusted Lodge #7s, before and after electrolysis:

Other Thoughts
As you read about the usage of electrolysis for cast iron cleaning, you will often encounter a few caveats about the choice of materials for the sacrificial anode.
Many frequent electrolysis users, unhappy with the constant need for anode replacement, have turned to stainless steel, some even going so far as to create a 360° setup by using a stainless steel barrel as both container and anode. The advantage to stainless steel is that it does not corrode as readily as do other types of steel or iron.
It is not unusual, however, to see comments that using stainless steel in an electrolysis setup creates a hazardous byproduct called hexavalent chromium. "Hex chrome", as it is referred to in the electroplating industry, is indeed a problem for those working in that industry, where, at the temperatures and voltages employed, it can be produced, vaporized, and released into the atmosphere. At the far lower voltages and temperatures commonly used for cast iron cleaning, however, hex chrome is not a concern.
Similar warnings are seen against using galvanized metals, and the possibility that zinc may be released into the electrolyte, where it may come into contact with the piece being cleaned. Again, the voltages used should not be sufficient to cause concern.
To avoid the foregoing types of concerns altogether, the use of graphite as an anode appears to fit the bill quite nicely. Graphite is a form of carbon that happens to be electrically conductive, but at the same time is far less reactive to the electrolytic process than the majority of metals. As such, the only thing that it can possibly introduce back into the electrolyte or to the piece being cleaned is plain carbon.
Graphite also has the advantage of not becoming coated with iron oxide as do typical metal anodes. It therefore needs no regular cleaning to maintain its performance. Storing the anode dry between cleaning sessions is recommended.
Although not as inexpensive as plain sheet metal or scrap iron, graphite can be had, considering its expected duty life, quite reasonably. Bars, rods, or plates of compressed extruded graphite are available from a variety of sources. Look online for liquidation sales of lots of remaindered graphite forms, avoiding those which mention other materials like copper in their composition.
It is important to note that, over time, any anode material used for electrolysis cleaning will deteriorate and will eventually need to be replaced.
Some users have found a hybrid electrolysis/lye method works well. Using the same concentration of sodium hydroxide as that used for a lye bath as the electrolyte can provide some advantages, including a "dual action" cleaning and increased metal anode life. The same cautions for using lye alone apply (if not more so).
Proper disposal of used electrolyte should include avoidance of soil contamination near vegetable gardens. And, as with any cleaning process, proper protocols should include thoroughly washing and rinsing the cleaned piece before beginning any seasoning regimen.
Finally, electrolysis should only be used to clean bare cast iron ware. Aluminum pieces will dissolve. Enameled cast iron pieces may also have their coatings compromised. Chrome or nickel-plated iron pieces may or may not be adversely affected, depending upon whether or not areas of plating have already begun to release or flake off.
  
|
||
| Any purchases you make from Amazon can help support this web resource. Click to find out how. | ||
|
|
||


|
This site is a participant in the Amazon Services LLC Associates Program, an affiliate advertising program designed to provide a means for sites to earn advertising fees by advertising and linking to Amazon.com or its affiliates. |