Aluminum Restoration
|
» Cleaning
» Polishing » Warps & Dents |
 As with old cast iron cookware, neglected aluminum ware also can often be rehabilitated.
With iron, we can rely on the chemistry of lye and electrolysis; with aluminum, however, we must primarily employ old-fashioned elbow grease. Since aluminum is not as hard a metal, it is unable to withstand the cleaning methods commonly used on iron. In a lye bath, at the concentration commonly used to clean cast iron, the aluminum will actually dissolve, and in rather short order. Electrolysis for extended periods is also not advisable, as similarly undesirable results can occur, in as little as half an hour.
Fortunately for us, and somewhat ironically, aluminum's relative softness is a plus. With mild abrasives and polishes, corrosion and tarnish can be removed, and the metal returned to its original luster. I say "ironically" because, if you refer to other discussions here of cast iron cleaning, you will note that sanding and other abrasives are considered destructive and detrimental to the collectible value of vintage cast iron. Not so with aluminum, apparently because there is no other practical method that does not involve moving or slightly removing some metal. Aluminum's softness also means we can often remove warps and dents.
Before we start, it should be made clear we are talking about cookware made of bare aluminum alloy with relatively smooth surfaces (i.e. not hammered or textured), and not the color anodized, the modern hard anodized aluminum, the enameled, nor pieces with any type of non-stick coating applied.
Cleaning
Begin by cleaning the aluminum piece as best you can of any organic residue. Boiling water in the pan, soaking the pan in very hot water, and scrubbing with a pad that does not scratch the metal are good starting points. Adding a few tablespoons of cream of tartar per gallon of boiling water is also said to remove the dark staining caused by cooking certain foods.
Dawn Power Dissolver™ spray, applied and allowed to sit for 30 minutes at a time often works wonders on baked on crud. Use a non-abrasive pad, a soft-bristled brush such as an old toothbrush, or wooden skewers to loosen and remove the softened residue.
Resist the temptation to use metal utensils as you will likely cause more harm to the finish than good.
More difficult residue can also be cleaned by running the piece briefly through a shortened cycle in a self-cleaning oven, perhaps for an hour or so. The high temperatures will reduce any organic residue to a powder that can simply be wiped or rinsed off. Caution must be exercised, however, as any non-aluminum parts must be removed, lest they be adversely affected or even destroyed. Steel parts such as bail handles or coil spring waffle iron handles will discolor and/or lose their tempering, and wooden handles obviously would not withstand the high temperatures.
Wood and coil handles can often be removed by unscrewing them, whereas bail handles may not be without risking damage. My preference in the case of a bail handle is to not attempt removal, ruling out using the self-cleaning oven.
Polishing
Once organic residues have been for the most part removed, we can begin the process of reviving the appearance of the metal. For this, we'll use a method involving gradually finer and finer abrasives to remove oxidation and discoloration.
This method should only be used on surfaces which were originally polished smooth, which on skillets and dutch oven pots may include the entire piece. On lids and other pieces, such as waffle irons and gem pans, it may only include rims or highlights. "As cast" surfaces should be cleaned as outlined above, but not refurbished using this method as it will irreversibly alter the original appearance.
Depending on the level of neglect, we may be able to only go so far in our efforts, stopping short of affecting the finished appearance undesirably. To restore a pitted area requires some removal of metal around the area as well. Overworking such a spot may result in a wavy appearance in the finished polished surface that is more distracting than a residual stain. Unfortunately, only experience and gut feeling will tell you if it's time to stop working on a particularly stubborn area.
Begin by gathering your supplies. You will need these items: Automotive wet/dry sand paper in 400, 600, 800, 1000, 1500, and 2000 grit sizes. In a case of heavy oxidation, 320 grit may be used to start, but will be more aggressive than the finer grades, so exercise caution if you decide to use it. If you purchase your sandpaper in an assorted grit pack, be aware you'll probably need more of the 400 grit than the others, as it will be expended more quickly working on the oxidation than will the finer grades that will later serve more as polishers. In most cases, I find half of a "one-third sheet" size piece to be about right for each stage of an average pot. You'll also need some automotive rubbing compound, some automotive polishing compound, some Mother's Mag & Aluminum Polish™, and some soft cotton rags. You can get all of these inexpensively in the auto and paint departments of your local Wal-Mart. Grades of the automotive wet/dry sandpaper not sold at Wal-Mart can be filled in at an auto parts store, at a slightly higher cost.

Automotive wet/dry sandpaper in "1/3 sheet" size packs.
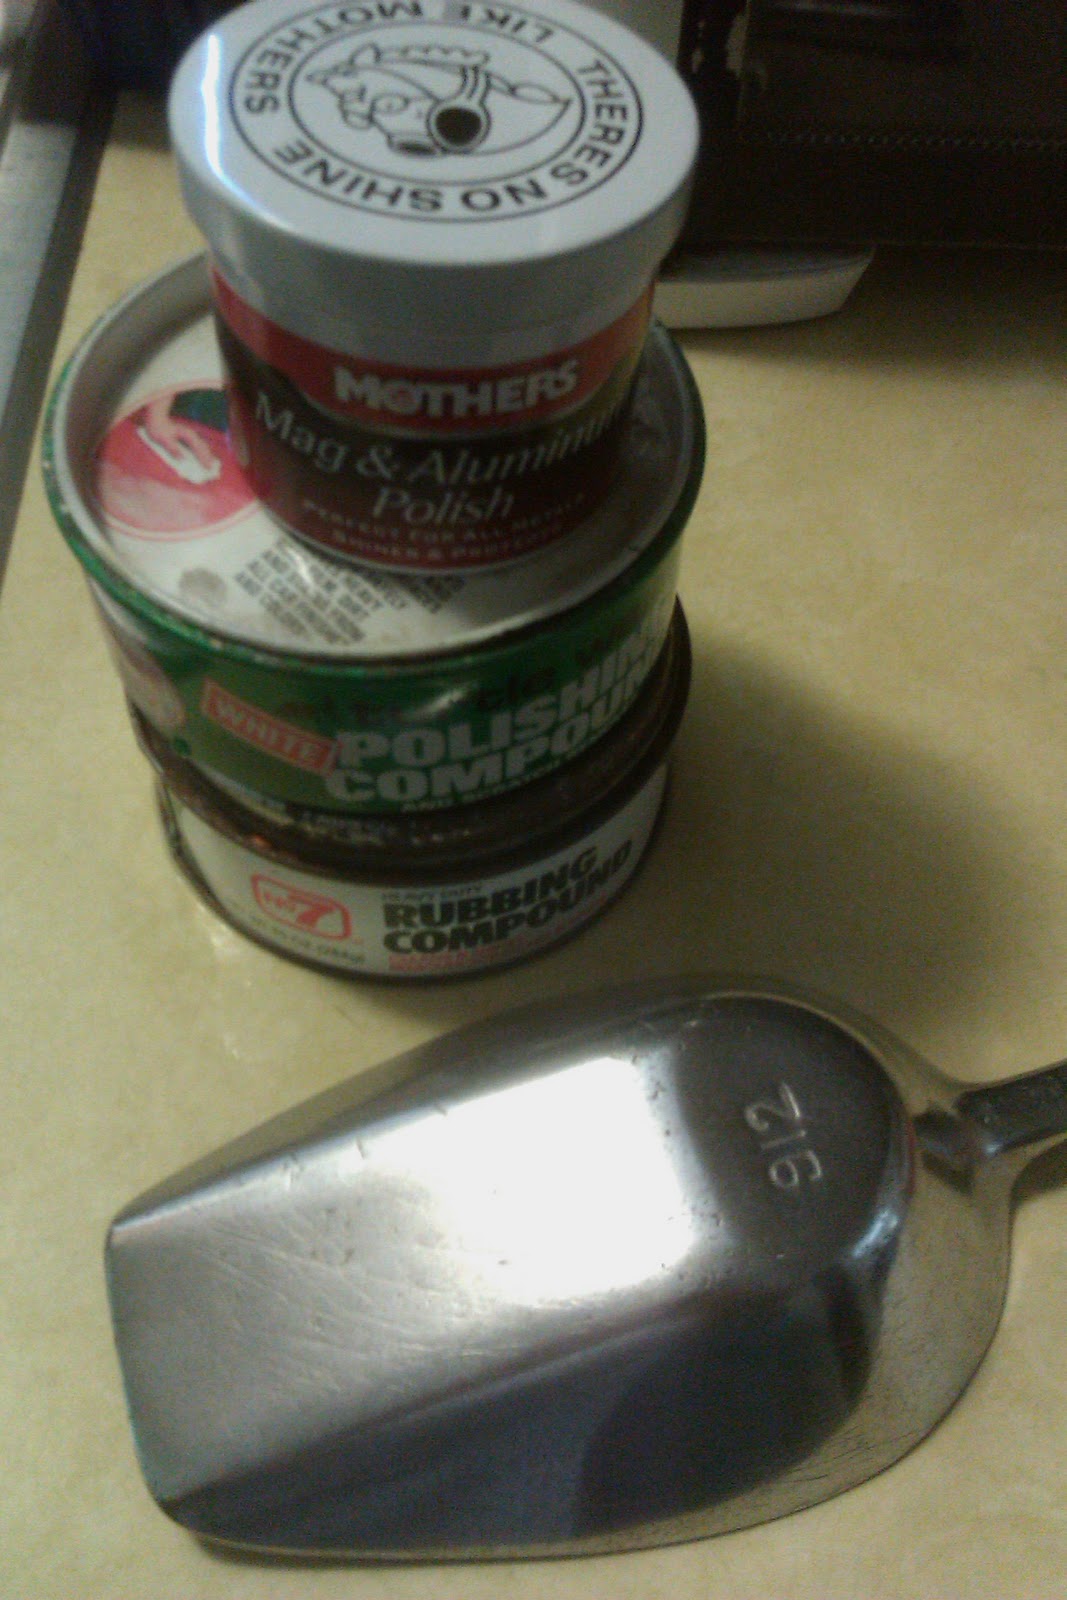
Polishing compounds, and a refinished aluminum scoop.
For the first few grades of sandpaper, you can dry sand, and rinse and dry the pan between grades. For the finer grades, you'll want to wet sand, under a trickle of running water, in order to keep the sandpaper from gumming up with removed oxidation and spent abrasive. I prefer to wet sand from start to finish, as it prevents airborne dust.
We'll use an alternating uni-directional sanding method which will allow us to keep track of what we have sanded using each grade. Start with the 400 grit paper, sanding in a back-and-forth motion in a single direction on a given area. By sanding with a linear motion, you'll be able to tell what you have sanded with the current grade, and have not sanded with the subsequent grades of sandpaper. 400 grit is a very fine grade of sandpaper. You'll probably think you're doing nothing but making smear marks on the surface, but keep going, making sure to sand only back and forth in the same single direction. This can be a little tricky on curved pieces like domed lids, but pick a reference point like a handle or trademark to help you keep track of what you're doing.
Now switch to the 600 grit, and sand at a 90 degree angle (perpendicular) to the marks left by the 400 grit, until all the new sanding marks have erased the old. Alternate the direction on the next grade and with each subsequently finer grade paper. When finished with the 2000 grit, the overall appearance of the pan should be that of a low-lustered or very finely-brushed aluminum.
Next, take a folded piece of the cotton rag, wet it and wring it out to just damp. Dab into the rubbing compound to get about a one inch diameter spot on your rag. Rub it thoroughly all over the piece as if you're using it to clean the surface. Directionality no longer matters; a back and forth or a circular motion is fine. Turn and refold the cloth frequently to a clean part as you go, adding another dab of compound as necessary. Wipe off the piece using a clean cotton rag, then go over the pan with rubbing compound once more, paying attention to any spots that still look tarnished.
Again wipe off the rubbing compound, and now repeat the process with one or more applications of the white polishing compound, in a similar fashion.
After the polishing compound is wiped off, you'll notice that your pan has become remarkably shiny. But there's one more step to really make it sparkle. Using a dry cloth this time, apply a dime sized dab of Mother's Mag & Aluminum Polish™ to a six by six inch area of the surface of the pan. Buff the area until a black residue begins to form on the cloth and pan. Turn the cloth to a clean spot, or use a clean cotton cloth or terry towel to wipe and buff the area. Following the instructions on the jar, don't allow the black residue to dry on the pan. Proceed to the next six by six area until the entire piece is finished. Now step back and admire your reflection in your beautifully restored aluminum pan.
The most impressive and rewarding results will come from pieces whose main issue is just an overall coating of oxidation. The best candidates for restoration will be those free of dents, gouges, deep scratches, or pitting.
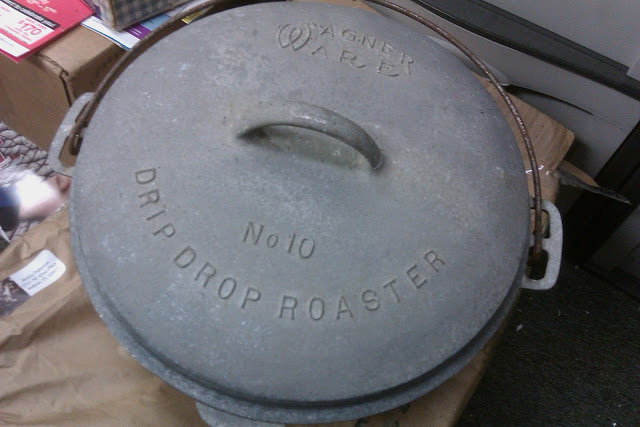
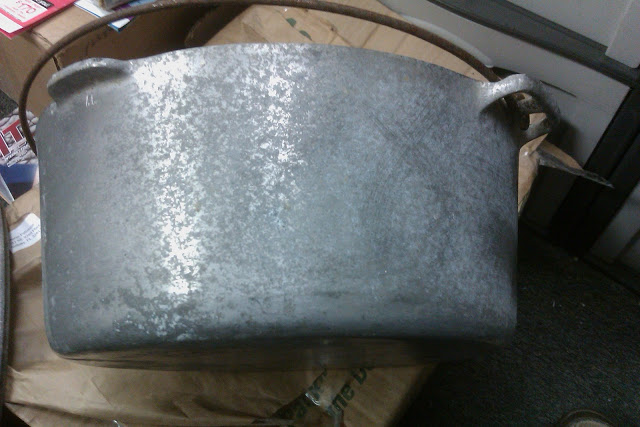
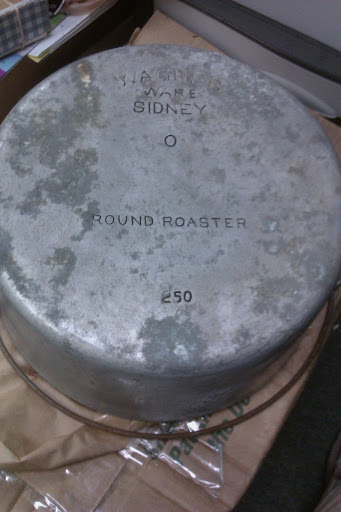
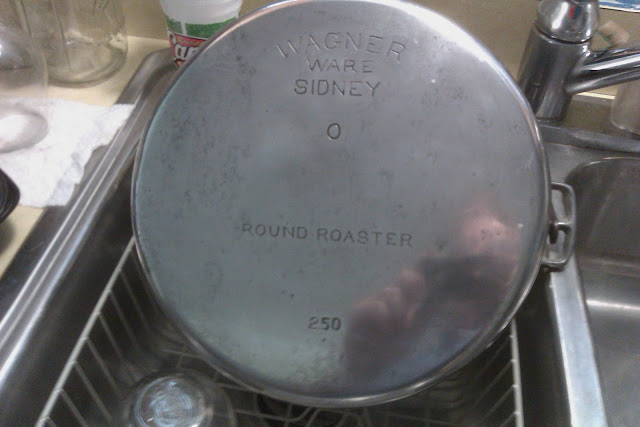
Here's a piece I did recently, a huge, vintage cast aluminum Wagner Ware No.10 Round Roaster dutch oven:
Before:
And after:
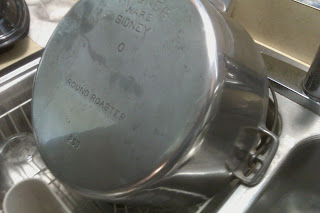
Note, in the case of this pan's cover, that only the outer rim was polished to a bright, smooth finish. The top of the cover was originally cast with a slightly rough texture. As such, all that was required to revive that area was a good scrubbing with a non-abrasive pad, followed by one application each of the rubbing compound, the polishing compound, and the Mother's polishing cream.
In many cases, you'll want to confine your cosmetic restoration activities to the outside surfaces of the piece. Over time and usage, most aluminum pans accumulate quite a bit of utensil marks and minor pitting on the cooking surfaces. If you intend to use the pan, you'll be making utensil marks of your own, so there's really not much point in rehabbing the inside, other than making it clean enough to cook in. If you feel you must, however, it is advisable to stop after the final sandpapering, so as not to introduce the volatiles found in the polishing compounds to areas that will contact food. Wash and rinse the pan thoroughly to remove any residue or spent abrasive.
Also note that some consider the level of luster achieved by the steps only up to and including the polishing compound to be more in keeping with that which was originally produced by some of the manufacturers. The mirror-like finish found on classic Magnalite may, on other brands, be on the excessive side. But it sure does look nice.
If your aluminum piece has a steel bail handle that you are unable or choose not to remove, simply use fine steel wool to remove as much rust or tarnish from it as you can, and then wipe it with vegetable or mineral oil to keep the rust from coming back.
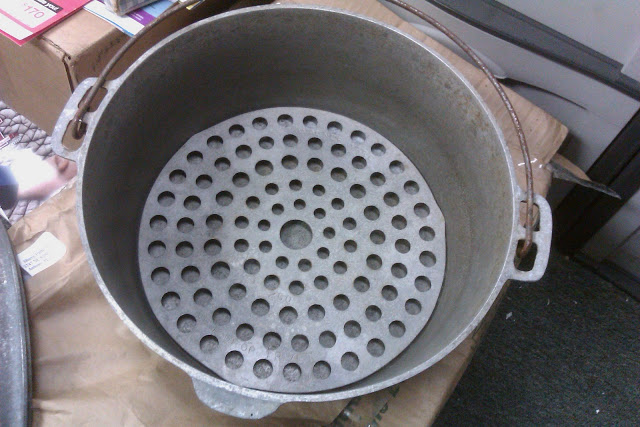
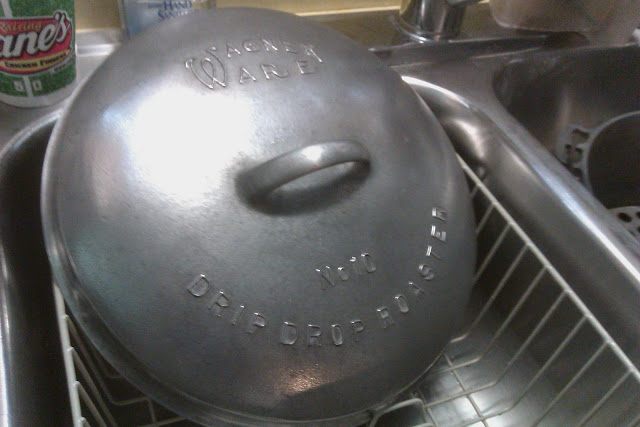
(Yes, my vintage find included a fully-marked, aluminum No.10 c/n 250 Wagner Ware Drip Drop trivet.)
Aluminum Warps & Dents
One advantage in restoration aluminum holds over iron is its malleability. Like iron, aluminum is known to warp in response to improper heating or cooling. Unlike iron which can often break, aluminum is more apt to be dented or deformed by impact. Fortunately, that also means this type of damage, if not significant, can often be successfully reversed.
Care must be exercised in aluminum warp and dent removal so that further damage does not result. Most deformities can be removed with the judicious use of a hammer, a wood block, and a towel.
In the case of a warped bottom, such as that of a skillet or a dutch oven with a downward bow, place the piece upside down on a sturdy surface. A workbench or a countertop protected with a towel or heavy cardboard, or even just on the floor using the towel or a piece of carpet can suffice. Determine the middle of the warp, and place a wood scrap such as a 2x4" or 1x4" block 4 to 5 inches long on top of it. Don't try to flatten the surface with one sharp blow of the hammer, but rather with several measured taps, checking the progress as you go. A soft wood like pine is best, as it should not mar the aluminum surface.
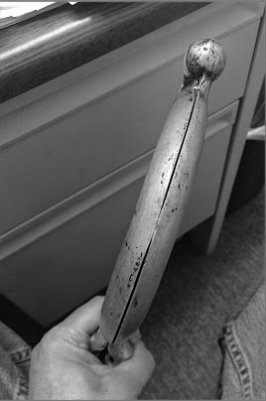
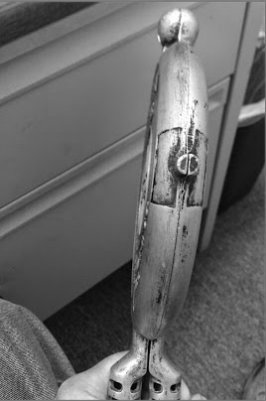
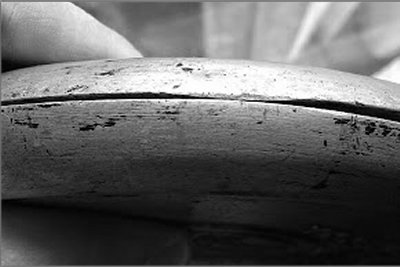
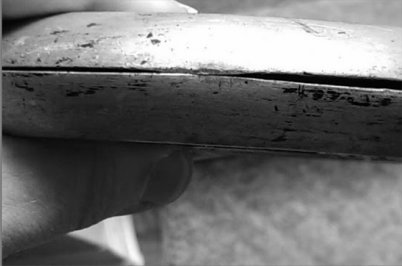
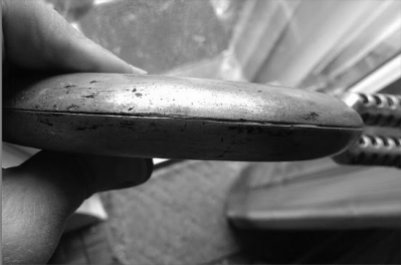
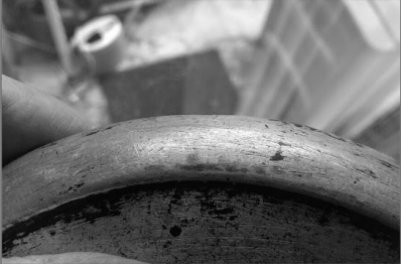
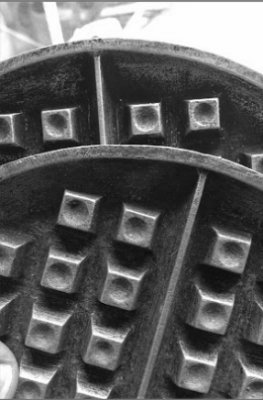
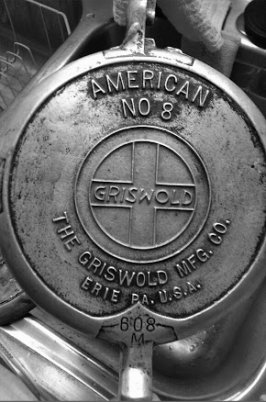
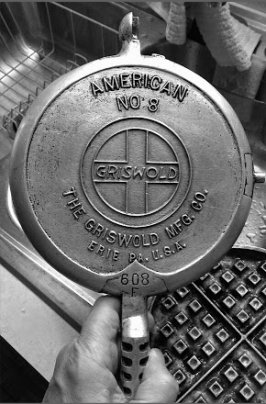
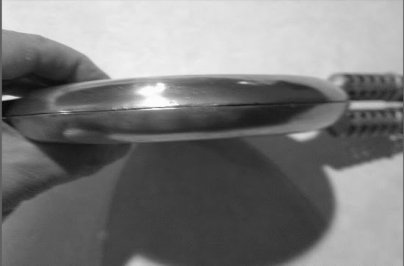
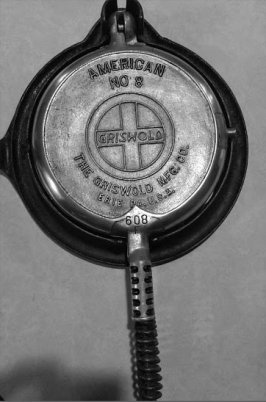
 Some deformities are more challenging. Here's a waffle iron I acquired recently which apparently had been used to strike something rather hard. Since both paddles had the same dents in the same spot, it appears they were assembled when the damage occurred. In this case, I was able to position each paddle on edge and, using a hammer and the end of my woodblock, coax them back into round.
 Gallery: Refurbishing an aluminum waffle iron with a dented edge.
  
|
||
| Any purchases you make from Amazon can help support this web resource. Click to find out how. | ||
|
|
||


|
This site is a participant in the Amazon Services LLC Associates Program, an affiliate advertising program designed to provide a means for sites to earn advertising fees by advertising and linking to Amazon.com or its affiliates. |